A quick guide for setting up a first wiki on Ubuntu - by NicoZanferrari, December 2009
Contents
1. About this HowTo
- MoinMoin versions
- 1.9.0 - 1.9.8
- Platforms
Ubuntu 8.04 - 15.04
This tutorial will show you step by step the manual installation of a single MoinMoin Wiki. It's as simple and quick as possible: in a few minutes, you'll be ready to enjoy and play with it ![]()
It works with recent Ubuntu (at least from 9.10 to 14.04 and one user reported success with 8.04 also) and MoinMoin will use the Apache web server, with the recommended WSGI module. And don't forget: suggestions and corrections are always welcome!
2. Apache Installation
Here is the manual installation procedure with Apache and mod_wsgi.
Note This is just one of the possibility. If you prefer the official Ubuntu packaged version for the installation, go to Chapter 5. And if you'd like to use nginx instead of Apache, go to Chapter 6.
2.1. Install the requirements
The basic requirements for MoinMoin 1.9 on recent Ubuntu are:
- apache2
- libapache2-mod-wsgi
Install them, for example, with a
sudo apt-get install apache2 libapache2-mod-wsgi
2.2. Install MoinMoin
I've chosen to use the original source code of MoinMoin, because it's always the latest stuff (for real women and men like we are, isn't it?).
Go to the Download section on http://moinmo.in/ and download the latest version, moin-1.9.4.tar.gz at this time. Open a Terminal shell, go to the download folder and unpack it with:
tar xvzf moin-1.9.4.tar.gz
You can find a file called docs/README_FIRST inside it for all the detailed information you should need. But for now, let's install it with the default options:
cd moin-1.9.4
sudo python setup.py install --force --prefix=/usr/local --record=install.log
2.3. Make a simple test
cd /usr/local/share/moin/server
sudo python test.wsgi
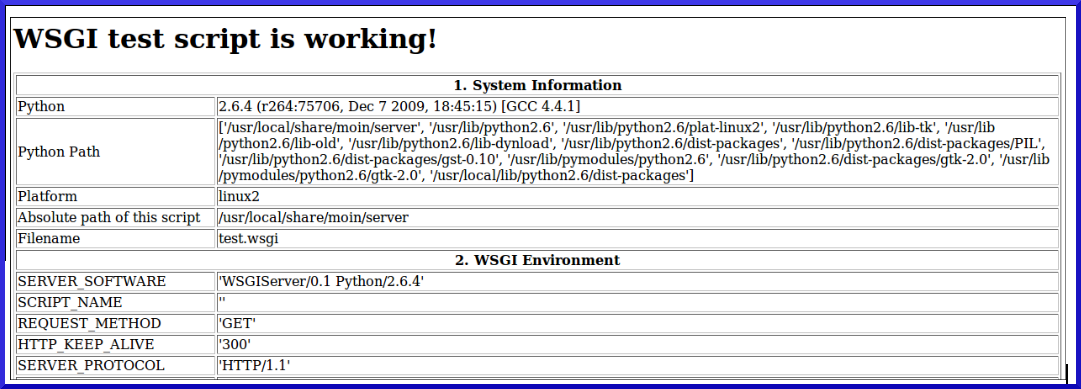
The terminal should answer with a line like:
Running test application - point your browser at http://localhost:8000/ ...
So, open your favourite Web browser (Firefox, I hope), go to http://localhost:8000/ and BINGO!

This means that the system is ready for setting up a real Wiki! Let's do it. ![]()
First, you have to close the test server with a Ctrl-C and then:
2.4. Configuration files copy
cd /usr/local/share/moin
sudo cp server/moin.wsgi .
sudo cp config/wikiconfig.py .
2.5. Web server configuration
sudo gedit /etc/apache2/apache2.conf
and add at the end:
#
#  MoinMoin WSGI configuration
#
# you will invoke your moin wiki at the root url, like http://servername/FrontPage:
WSGIScriptAlias /   /usr/local/share/moin/moin.wsgi

# create some wsgi daemons - use these parameters for a simple setup
WSGIDaemonProcess moin user=www-data group=www-data processes=5 threads=10 maximum-requests=1000 umask=0007

# use the daemons we defined above to process requests!
WSGIProcessGroup moin
For apache 2.4 and later, also include this:
<Directory "/usr/local/share/moin">
    Options All
    AllowOverride All
    Require all granted
    Allow from all
</Directory>
save & close the file.
2.6. WSGI stuff
sudo gedit /usr/local/share/moin/moin.wsgi
and add at the end of the a2) paragraph the line:
sys.path.insert(0, '/usr/local/share/moin')
save & close the file.
2.7. Needed security setup
cd /usr/local/share
sudo chown -R www-data:www-data moin
sudo chmod -R ug+rwx moin
sudo chmod -R o-rwx moin
This will fix the file security of the Wiki pages, allowing only the Web server service user (www-data) to be able to modify them.
2.8. Apply changes
sudo /etc/init.d/apache2 restart
Or alternatively on newer versions of Ubuntu:
sudo service apache2 restart
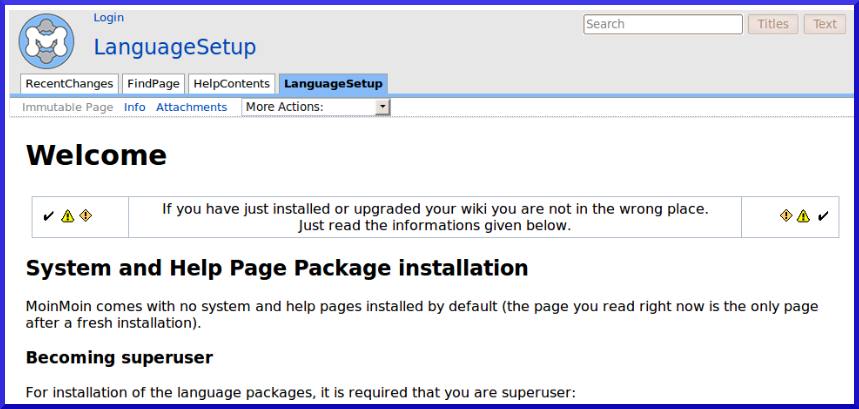
That's all for a basic Wiki! Now open the browser on http://localhost/ and you'll see the Welcome page.

Now let's make it really usable.
3. Basic Wiki configuration
3.1. Just the essential configuration
sudo gedit /usr/local/share/moin/wikiconfig.py
(be careful: this is a Python program and proper indentation is very important when you edit it! ![]() ).
).
Uncomment and modify the Welcome Front Page as:
page_front_page = u"FrontPage"
+ last but not least, give the name of the superuser like
superuser = [u"WikiAdmin", ]
save & close the file.
3.2. Apply changes
sudo /etc/init.d/apache2 restart
3.3. Language setup
Open again the FrontPage on http://localhost (it'll be almost empty now!). Create the WikiAdmin user by choosing:
Login
and then:
(If you do not have an account,) you can create one now.
Be careful to obtain a "User account created! You can use this account to login now..." message after its creation ![]() . And also, remember that usernames in our environment are case sensitive
. And also, remember that usernames in our environment are case sensitive ![]() .
.
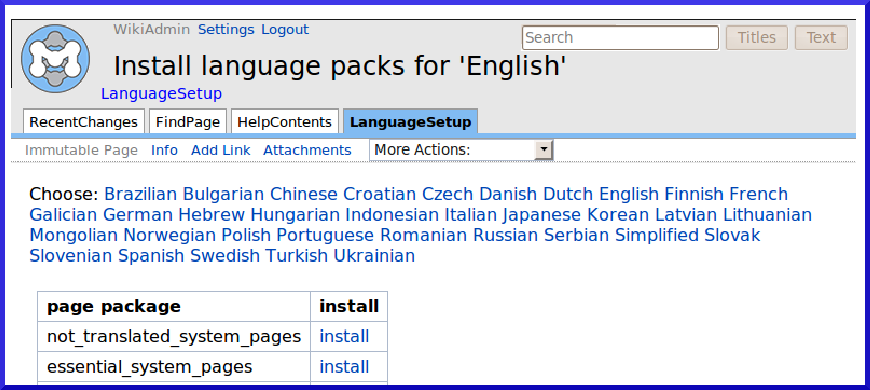
Login as WikiAdmin and then go to http://localhost/LanguageSetup?action=language_setup

Pick up your language if different from English, then press install on the all_pages link (it's the last line in the list). You'll obtain a "Attachment 'English_all_pages.zip installed." message.
3.4. Apply last changes
sudo /etc/init.d/apache2 restart
END ![]()
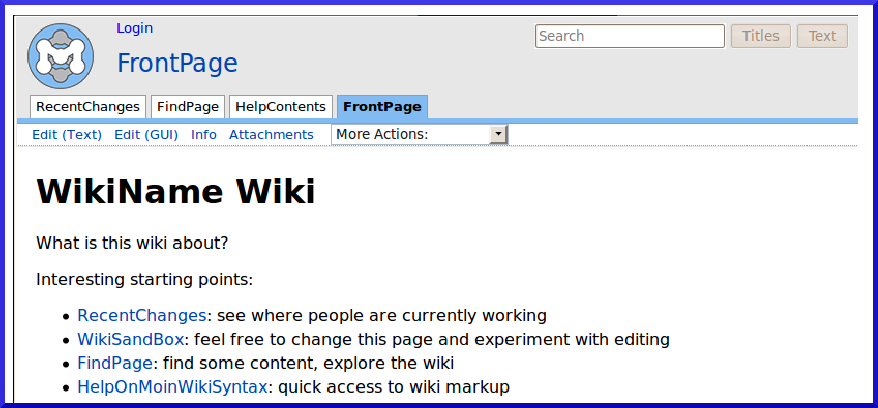
Here is the new FrontPage, ready to be changed and enriched by you and all the users!

4. Quick tips
You can find some quick configuration tips here. They are not mandatory for the wiki, but I think they are the second thing you'll play with (the first one is the wiki itself, if you've wondering!).
of course, the users of your wiki cannot use http://localhost
 Find the name of your machine and tell them to use an URL like http://mywikiserver
 if you don't want (or cannot) use the wiki on the virtual root of your Web server, you simply have to change WSGIScriptAlias parameter on apache2.conf and edit in wikiconfig.py url_prefix_static with the new path:
sudo gedit /etc/apache2/apache2.conf
- Setup your alias:
WSGIScriptAlias /mywiki /usr/local/share/moin/moin.wsgi
Open wikiconfig.py:
sudo gedit /usr/local/share/moin/wikiconfig.py
- Then uncomment and edit url_prefix_static adding the new path:
url_prefix_static = '/mywiki' + url_prefix_static
- Now restart apache:
sudo /etc/init.d/apache2 restart
In this way, your wiki will be alive on http://mywikiserver/mywiki
your Wiki does not still have a name. As a consequence the browser will show an ugly "Untitled Wiki" message on the top bar. In order to change it, just modify the sitename parameter on wikiconfig.py.
- configure the Mail section on wikiconfig.py. Your users will be able to use the password reset feature and will be informed of changes on subscribed pages.
- you'll probably have to change the default time zone. In wikiconfig.py, add a line like:
tz_offset = 1.0 # default time zone offset in hours from UTC
That's all, I hope you've found it useful.
5. Official Ubuntu package installation
If you prefer, you can use the official Ubuntu package for the installation - instead of the source code described in chapter 2. Just search and install the python-moinmoin package in the "Ubuntu Software Center" or Synaptic. Or issue the command:
sudo apt-get install python-moinmoin
Notes:
- this will currently the 1.9.3 version (October 2011)
- be careful: where the instructions above say /usr/local/share/moin you must use /usr/share/moin
- you may want to use /etc/moin for config files instead of /usr/share/moin
After the package installation, follow the instructions from chapter 2.3 "Make a simple test".
6. Nginx Installation
For better performance you can install Moin with nginx and uwsgi, instead of using Apache as documented before. So, this chapter is alternative to the Apache section - choose only one of them, depending on your need.
6.1. Install Packages
# Install nginx
sudo add-apt-repository ppa:nginx/stable
sudo aptitude update
sudo aptitude install nginx

# Install and activate python virtualenv
sudo aptitude install python-pip
sudo pip install virtualenv
sudo mkdir -p /srv/www/moin
sudo virtualenv /srv/www/moin/pythonenv
source /srv/www/moin/pythonenv/bin/activate

# Download and install moinmoin:
cd /tmp
wget http://static.moinmo.in/files/moin-1.9.7.tar.gz
tar zxvf moin-1.9.7.tar.gz
cd moin-1.9.7
python setup.py install

# Deactivate python virtualenv
deactivate

# Copy wiki to /srv/www/moin
cp -r ./wiki /srv/www/moin/

# Copy configs to wiki root directory
cd /srv/www/moin/wiki/
cp config/wikiconfig.py ./
cp server/moin.wsgi ./
Thanks to python virtualenv, all moin related files were installed to '/srv/www/moin/pythonenv/lib/python2.7/site-packages/'
6.2. Config moinmoin
Edit moin.wsgi and add the following lines below the first import and above from MoinMoin.web.serving import make_application to add the virtualenv to path:
vi /srv/www/moin/wiki/moin.wsgi
sys.path.insert(0, '/srv/www/moin/pythonenv/lib/python2.7/site-packages/')
sys.path.insert(0, '/srv/www/moin/wiki/')
Fix permission
chown www-data:www-data -R /srv/www/moin
chmod o-rwx -R /srv/www/moin
6.3. Deploy with uwsgi
aptitude install uwsgi uwsgi-plugin-python
Add an uwsgi.xml config file:
vi /srv/www/moin/wiki/uwsgi.xml
<uwsgi>
    <uid>www-data</uid>
    <gid>www-data</gid>
    <plugin>python</plugin>
    <socket>/srv/www/moin/moin.sock</socket>
    <wsgi-file>/srv/www/moin/wiki/moin.wsgi</wsgi-file>
    <limit-as>256</limit-as>
    <processes>8</processes>
    <logto>/var/log/uwsgi/uwsgi.log</logto>
    <memory-report/>
    <vhost/>
    <no-site/>
</uwsgi>
Add uwsgi instance as systerm service using startup:
vi /etc/init/moin.conf
description "moin uwsgi service"

start on runlevel [2345]
stop on runlevel [!2345]

chdir /srv/www/moin/wiki/
exec uwsgi -x /srv/www/moin/wiki/uwsgi.xml
respawn
Start moin uwsgi service
start moin
6.4. Config nginx
server {
    server_name wiki.example.com;

    access_log /var/log/nginx/access.log;
    error_log /var/log/nginx/error.log;

    location / {
        include uwsgi_params;
        uwsgi_pass unix:///srv/www/moin/moin.sock;
        uwsgi_modifier1 30;
    }
}
Visit wiki.example.com and the wiki is up now.
6.4.1. Alternative nginx.conf to serve wiki from different path
If you want to serve your wiki not from root path (/) but from another path (for example /mywiki), you may need to do the following two things:
first thing is to update wikiconfig.py (similar like described above for Apache) - uncomment and edit url_prefix_static adding the new path:
url_prefix_static = '/mywiki' + url_prefix_static
second thing is to update nginx.conf and replace the location / ... directive with similar to this one:
        location /mywiki/ {
            include uwsgi_params;
            uwsgi_param  SCRIPT_NAME  /mywiki;
            uwsgi_pass unix:///srv/www/moin/moin.sock;
            uwsgi_modifier1 30;
        }
It is the equivalent for the Apache's usage of WSGIScriptAlias. For details on the issue with SCRIPT_NAME and nginx see this: [https://community.webfaction.com/questions/14960/locationpath-troubles-with-uwsgi-configuration-and-wsgi-application-moinmoin]
6.5. Troubleshooting
In case of having trouble because of socket permission (check /var/log/nginx/error.log for that) and running nginx not as root, but for example as nginx user, try the following:
modify uwsgi.xml and add the following line to change uwsgi socket permissions:
then restart moin service:<chmod-socket>660</chmod-socket>restart moinadd nginx user to the secondary group www-data
usermod -G www-data nginxmodify user directive in the nginx.conf to use the secondary groups' permission:
then reload nginx configuration:user nginx www-data;service nginx reload
In case the moin service won't start, verify that /var/log/uwsgi/ directory exists.
7. Enable GUI Editor
If you use the pre-packaged version of MoinMoin supplied by Ubuntu (python-moinmoin), the fckeditor is not by default included -- its package is listed as a "recommends". This requires a few extra steps to resolve if you choose to do so.
From the terminal of your choice, execute the following:
Note: Replace moin's FCKeditor installation directory with /usr/local/lib/python2.7/dist-packages/MoinMoin/web/static/htdocs/applets/FCKeditor for latest installations.
In sequence, this will:
Install the FCKeditor package & files onto your system.
Remove the "default" file-folder that MoinMoin expects the FCKeditor to 'live' in.
- Replace that location with a symbolic link ('shortcut') to the packaged location that apt-get will install it to, allowing the package manager to continue updating these files as needed.
- Restart the apache web-server, ensuring your changes are 'picked up' properly. (If you are using nginx, that service will require restarting instead of 'apache2').
8. Suggestions
hey great; I luv ubuntu and here some suggestions. Maybe for just a simple "localhost" wiki, like this site explains, my stuff is too complicated... well.... -- 212.203.75.130 2010-01-11 12:33:54
- security: I use a separate moinmoin user for my wsgi process (only the htdocs and moin.wsgi has to be accessible from the main apache)
- security: In the examples above moin.wsgi ends up being owned and writable by the web server user. This is a bad idea.
security: I use per default some acl_default stuff HelpOnAccessControlLists#Inheriting_from_.27Default.27
config: I don't edit http.conf, I like more to create a new separated file (with VirtualHost config stuff) under sites-available and activate (a2ensite) it to sites-enabled
- performance: I let the apache handle the static / htdoc files and not the moinmon process (alias)
- performance: I always install xapian...
- HINT: to restart the wsgi process you also can touch the moin.wsgi file instead of restarting the server.
- maybe rather use /var for variable data (like a wiki), not /usr
- if you don't see static content, like pictures, check that your WSGIScriptAlias does not have too many slashes.
- oo
